Sending HTML emails and PDF with node js

In the middle of a project that I am working on as a front end developer (I know this is backend 😬) I wanted to send mails with a kind of invoice, or at least that’s what I’m trying to.
I find out two node packages that makes me pretty easy this functionality one of them is nodemailer and the other one is puppeteer.
In this article we are going to do 4 things:
- Send a plain text mail.
- Send a HTML template by mail.
- Send a PDF file attached in the mail.
- Create a PDF file from HTML template and send it by mail.
Send a plain text mail
Starting a project with Node
In terminal we create a folder and start an npm project:
mkdir sendingPDF
cd sendingPDF
npm init -y
after this, we can start to install all the packages that we are going to use, in this case these will be
- nodemon (Global installation to simulate a local server)
- express framework (to set up our server)
- nodemailer (to send emails)
- puppeteer (to create PDF files)
npm i express nodemailer puppeteer
npm i -g nodemon
Index.js file:
This file will be on the root and will be the set up file.
const express = require('express');
const app = express();
const port = 3000;

app.get('/', (req, res) => {
  res.send('Hello World!');
});

app.listen(port, () => {
  console.log(`Example app listening at http://localhost:${port}`);
});
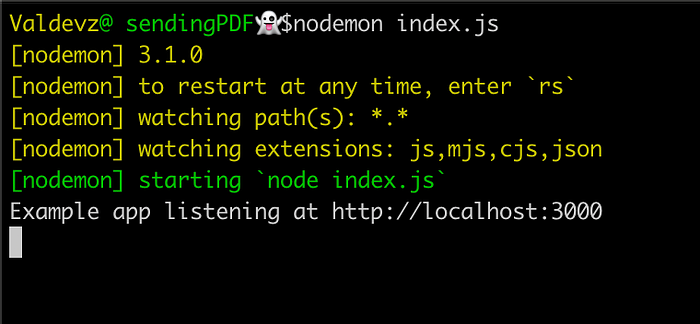
Then we start the server with:
nodemon index.js
Now we have our server running on localhost port 3000.

We are going to create our mail route, and when the user visit this url the mail controller triggers.
We add the next script to our index.js:
const express = require('express');
const MailController = require('./Controllers/MailController');
  app = express(),
  port = 3000,

app.get('/', (req, res) => {
  res.send('Hello World!');
});

app.get( '/send-mail', ( req, res ) => {
  try {
    MailController.sampleMail()
    .then( () => {
      return res.status( 200 ).type('json').send( 'Email sent successfully' )
    })
  } catch (error) {
    res.status( 500 ).send( 'Unknown error' )
    throw error;
  }
})

app.listen(port, () => {
  console.log(`Example app listening at http://localhost:${port}`);
});
Create a folder with the name of Controller and inside we create a file named MailController that looks like this:
const nodemailer = require("nodemailer");

let emailConfig = {
  host: 'smtp.gmail.com', // SMTP provider in my case is Gmail
  port: 587, // the port that your SMTP provider ask for
  secure: false,
  auth: {
    user: 'your-user-mail',
    pass: 'the-password-of-your-mail',
  },
}

let email = 'destinatary@mail.com'; //email destination
let sender = 'your-email'; // email where the mail's gonna be sent

class MailController {
  static async sampleMail(){
    // create the object for nodemailer
    let message = {
      from: sender,
      to: email,
      subject: 'Sending Mail from node.',
      text: 'Body of the mail.',
      envelope: {
          from: `Valdevz <${sender}>`,
          to: `${email}, <${email}>`
      }
    }
    this.mailSender(message);
  }

  static async mailSender(data){
    let transporter = nodemailer.createTransport(emailConfig);
      transporter.verify((error) => error ? error: '');
      transporter.sendMail(data);
  }

}

module.exports = MailController;
If you have never used an SMTP, I let you the nodemailer documentation where you can read about it.
createTransport is the object that nodemailer needs to send the mail
verify literally verifies the SMTP configuration and if exist an error you can throw it.
and at the end we have sendMail , this is the method that nodemailer use to send the email using the pre setted up transport object
If we visit the http://localhost:3000/send-mail we are going to receive this response:

and in my email inbox

Send a HTML template by mail.
Now, if we do not want to send plain text in the mail we can replace the text attribute inside message variable for the html attribute that receives a string with HTML format.
For this part we are going to create a function that returns the html.
At the root of the project create theTemplate folder and for the file I named it as HtmlTemplate.js
I took a template from Bootdey
const htmlTemplate = () => {
  return `<!DOCTYPE html>
<html lang="en">
<head>
  <meta charset="UTF-8">
  <meta name="viewport" content="width=device-width, initial-scale=1.0">
  <title>Document</title>
<style>
</style>
  here is where we are going to insert the css snippet.
</head>
<body>
  here is where we are going to insert the html template.
</body>
</html>`
}

module.exports ={
  htmlTemplate
}
Then we import this file in the MailController
const nodemailer = require("nodemailer"),
{ htmlTemplate } = require("../Template/HtmlTemplate");

let emailConfig = {
  host: 'smtp.gmail.com', // SMTP provider in my case is Gmail
  port: 587, // the port that your SMTP provider ask for
  secure: false,
  auth: {
    user: 'your-user-mail',
    pass: 'the-password-of-your-mail',
  },
}

let email = 'destinatary@mail.com'; //email destination
let sender = 'your-email'; // email where the mail's gonna be sent

class MailController {
 static async htmlMail(){
    let message = {
      from: sender,
      to: email,
      subject: 'Sending Mail from node.',
      html: htmlTemplate(),
      envelope: {
          from: `Valdevz <${sender}>`,
          to: `${email},<${email}>`
      }
    }
    this.mailSender(message);
  }

  static async mailSender(data){
    let transporter = nodemailer.createTransport(emailConfig);
      transporter.verify((error) => error ? error: '');
      transporter.sendMail(data);
  }

}

module.exports = MailController;
and finally we create our route to receive this HTML mail, insde the index.js file.
const express = require('express');
const MailController = require('./Controllers/MailController');
  app = express(),
  port = 3000,

app.get('/', (req, res) => {
  res.send('Hello World!');
});

app.get( '/send-html-mail', ( req, res ) => {
  try {
    MailController.htmlMail()
    .then( () => {
      return res.status( 200 ).type('json').send( 'HTML email sent successfully' )
    })
  } catch (error) {
    res.status( 500 ).send( 'Unknown error' )
    throw error;
  }
})

app.listen(port, () => {
  console.log(`Example app listening at http://localhost:${port}`);
});
and after we visit this route, in the email inbox we have the result.

Send a PDF file attached in the mail.
We are going to create a temp folder at the root, to allocate a PDF file and sent it by mail.
Then we are going to create the route for this functionality in index.js file.
app.get( '/attaching-pdf', ( req, res ) => {
  try {
    MailController.attachedFileMail()
    .then( () => {
      return res.status( 200 ).type('json').send( 'PDF attached and mail sent successfully' )
    })
  } catch (error) {
    res.status( 500 ).send( 'Unknown error' )
    throw error;
  }
})
Now inside of the MailController class we create the method to attach the pdf and send the mail.
static async attachedFileMail(){
    let message = {
      from: sender,
      to: email,
      subject: 'Sending Mail with attached file from node.',
      attachments: [
        {
            path: __dirname + '/../temp/file.pdf',
            filename: 'file.pdf',
            contentType: 'contentType'
        }],
      envelope: {
          from: `Valdevz <${sender}>`,
          to: `${email},<${email}>`
      }
    }
    this.mailSender(message);
  }
attachments : is an array where you can attach many files, following the structure of the attribute.
path : is the route of the file including the name of it.
filename : is the name that the file is going to take, if you set the value as false , filename is generated automatically.
contentType : optional field content type for the attachment, if not set will be derived from the filename property.
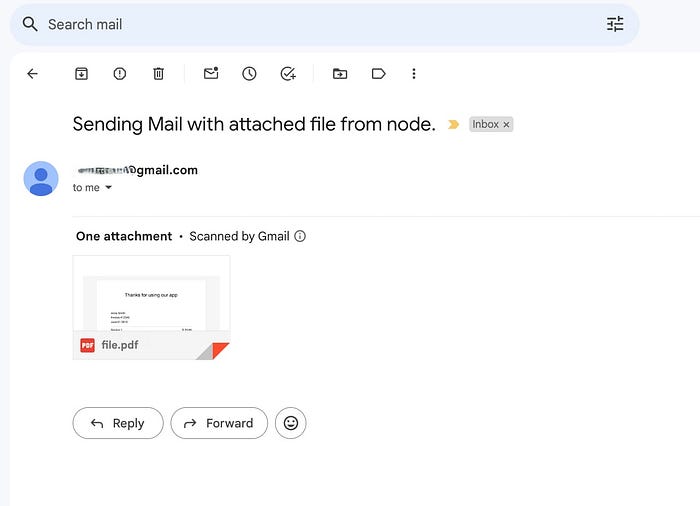
After this visit the url configured to trigger the method and we will see this in our inbox.

Create a PDF file from HTML template and send it by mail.
For the last functionality we are going to use the html template to convert this html code into a pdf file.
First we are going to create the route in the index.js file and call the method :htmlToPdfMail
app.get( '/html-to-pdf', ( req, res ) => {
  try {
    MailController.htmlToPdfMail()
    .then( () => {
      return res.status( 200 ).type('json').send( 'PDF attached and mail sent successfully' )
    })
  } catch (error) {
    res.status( 500 ).send( 'Unknown error' )
    throw error;
  }
})
Creating the method inside the MailController
const nodemailer = require("nodemailer"),
      puppeteer = require("puppeteer"),
      { htmlTemplate } = require("../Template/HtmlTemplate");

let emailConfig = {
  host: 'smtp.gmail.com', // SMTP provider in my case is Gmail
  port: 587, // the port that your SMTP provider ask for
  secure: false,
  auth: {
    user: 'your-user-mail',
    pass: 'the-password-of-your-mail',
  },
}

let email = 'destinatary@mail.com'; //email destination
let sender = 'your-email'; // email where the mail's gonna be sent

class MailController {
 static async htmlToPdfMail(){
  try {
    const browser = await puppeteer.launch();
    const page = await browser.newPage();
    const template = htmlTemplate();
    await page.setContent(template, {waitUntil: 'domcontentloaded'})
    await page.pdf({
      path: __dirname + '/../temp/file2.pdf',
      printBackground: true,
      format: 'A4',
    })
    await browser.close()
    let message = {
      from: sender,
      to: email,
      subject: 'Converting HTML code to PDF file.',
      attachments: [
        {
            path: __dirname + '/../temp/file2.pdf',
            filename: 'file2.pdf',
            contentType: 'contentType'
        }],
      envelope: {
          from: `Valdevz <${sender}>`,
          to: `${email},<${email}>`
      }
    }
    this.mailSender(message);
  } catch (error) {
    throw error;
  }
}

  static async mailSender(data){
    let transporter = nodemailer.createTransport(emailConfig);
      transporter.verify((error) => error ? error: '');
      transporter.sendMail(data);
  }

}

module.exports = MailController;
the difference here is that we used Puppeteer to create the PDF, for this we simulate a browser to create the file, as the documentation of puppeter says, Puppeteer stores a browser to do this and other things too, like take screenshots of a website automatically.
Then the newPage method bring us a new blank page in the browser previously configured, the template variable get the html with the help of the htmlTemplate function that we create on last functionality.
The setContent method will create the file passing to it as first parameter the html content in a string, and the second parameter is optional, but we setted up {waitUntil:'domcontentloaded'} to wait for the complete load of the dom.
After the creation of the file ends, the pdf method help us to save in pdf format the file, giving it the path where we want to locate it. The printBackground attribute is to print background graphics and the format attribute is for the size of the page that we want to use.
The rest of the function is the same as in the ‘Send a PDF file attached in the mail’ functionality, inside of message.attachments we pass the new route of the file that we just create seconds ago and call to the mailSender function to send the mail.
If we go to the route html-to-pdf we can see the file2.pdf in our email inbox:

Pro tip: You can combine html code and attachments in the same mail, even include plain text as well
I will let the repo of this project on my github
If you are reading this, thanks for making it to the end.
I will appreciate if you consider clapping👏 and follow me. This was my first article
